
Want to go faster? Time for your car to go on a diet.
Weight reduction is often one of the simplest and cheapest ways to make your car go faster. In the first installment of our “Weight Reduction” Series, we’re focusing on custom door cards and deleting the power windows.
During a recent underbody restoration on the Budget Time Attack Evo, we built a homemade car rotisserie so we could remove rust from the car. To get the car ready for the rotisserie, it was important that it be as light as possible. And since we ended up removing every single part from the car, it was easy for us to see exactly how much everything weighed.
Weight reduction is usually more effective when you know just how much you are trimming off! Of the heaviest items removed from the car, the doors came in at 50 lbs each (front and rear). In the interest of going faster, they had to go! Well, except you do need doors… so we opted to just delete as much as possible from them. That meant saying bye to the power windows, the automatic door locks, the door cards, and the glass windows.
Let’s Get Started
So with weight reduction in mind, the first step was to remove the door cards. Just a few screws and clips hold them on. Next was the removal of the doors. This required disconnecting the electrical connectors for each door, unbolting the hinges, and carefully lifting the doors off of the car. With that all done, we set about gutting the doors.

The rear door, removed and ready to be gutted.
For this post, we will simply show the work done on the rear door, but the same applies for the fronts.
The first thing we removed was the plastic dust shield that was hiding all the internals. The glue used on this is a pain in the ass, but if you make a ball out of it you can use it to pull more off. After that was all removed, a quick shot of Goo-Gone followed by some de-greaser helped to clean off any remaining glue.

The plastic dust shield inside the door.

The plastic dust shield removed from the rear door.
Two screws attach the window glass to the regulator and track. After unscrewing them, 5 more bolts hold the track and the motor to the door. With these removed, and a quick disconnect of some electrical connectors, the regulator and track can now be removed. Be prepared for a bit of a struggle as you try to find the best angle to pull it out.

The window regulator and track removed from the door.
After this, we moved on to removing the glass. Under the door seal, there’s one lone screw hiding out that holds the sash to the outside door frame. Another two bolts attach the bottom of the sash to the door panel. With these removed, the sash can be moved around, giving enough space for the small rear pane of glass to be removed. After it is out, the larger pane can then be removed. These were put in a safe place for later as they would be used to make the templates for the Lexan.

The hidden screw attached to the window sash.

The window sash being removed from the door.

The small window pane removed from the door.
With the windows now removed, only the lock mechanism and the door wiring remained. The wiring is held in with a few plastic clips that can easily be removed with a pair of needle nose pliers. As for the door lock, we decided to pull the whole mechanism out and remove the electric solenoid, but if you want to keep it simple, just leave it in there. It’s quite a pain to remove all the internals as they are attached to the exterior door handle. Either way, the door handle on the inside needs to be removed for when the template is being made.

The large window pane removed from the door.

All the rear door internals removed.
Custom Door Cards
To get these custom door cards fitting perfectly (and ensure we only had to cut plastic once per door), we made up a template that was sturdy enough to stand up to the tough demands of garage DIY-ing. We used a roll of Ram Board, a contractor type of cardboard used for protecting floors. After cutting out an initial piece, we placed it against the door and started to poke out holes where the plastic clips used to be. We used a bunch of spare plastic clips to attach the cardboard to the door. (Put your door on something soft so you don’t have big gouges in the paint when you pick it back up).

Ram board used to make the template for the door card.

Ram board cut to make our custom door card template.
After the piece was secured, we used a utility knife to cut out the shape of the template. It’s important to go slow with this process and be careful not to scratch the door paint while cutting the piece out. After the template was all cut out, it was removed from the door, and the door handle was screwed back on. The template was then put back against it, and a hole for the handle was cut out.

The cardboard template, all cut and ready to transfer.
We put the now complete template against a thin, 1/8” piece of black ABS plastic. We traced the shape on to the plastic first, and then further carved it out using a utility knife. The holes were also drilled into the piece while it was still attached to the template.
Since the sheet was thin, a knife was all that was needed for cutting out the door card. Simply carve out a bit of the plastic, and then break the pieces off. As long as the shape has been carved into the plastic, it will break into the shape you want. Finish the edge off with some sanding, and you have yourself a new custom door card!

Transferring the door card template to ABS plastic.
Mount the Custom Door Cards
At this point, you’re on the home stretch (for your first door), so congrats! The first door takes the longest, but once you know where your screws and clips all are, doors 2, 3, and 4 should be a breeze.
To secure the custom door card, we opted for threaded rivets. Using a handful of #10-24 rivets placed into the pre-existing holes, and matching button head screws, we had an easily removable solution for mounting the door card. Though the finished panel may not be as appealing as a carbon fibre door card, it was a cheap and easy solution for covering up the door.

Installing threaded rivets on the door.
When all was said and done, the rear doors had shed 16 lbs each. Of course, the Lexan windows are still to be added, but they should only add a few pounds each. It was a quick, easy, and cheap weight reduction project that required few tools and caused almost no headaches.

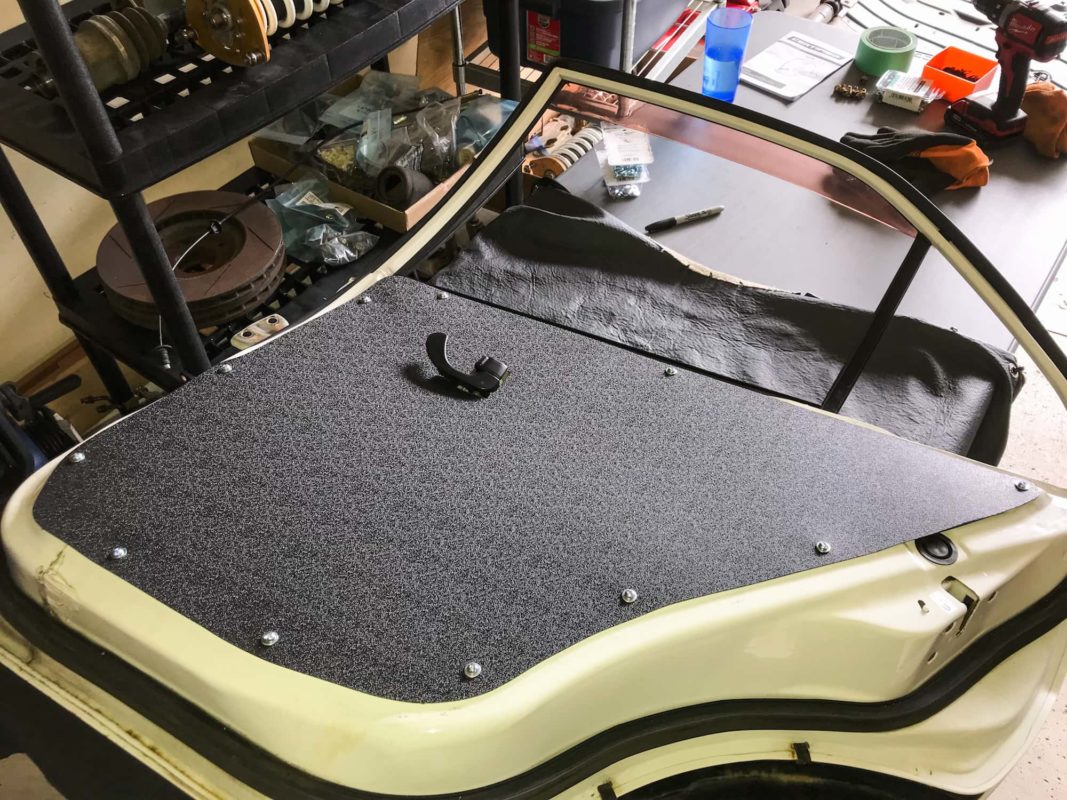
The finished door card.
Whether you’re making your own Budget Time Attack Evo, or you just want a quick and easy weight reduction project, removing unnecessary internals is a great start. And if you still want the interior to look somewhat attractive, adding custom door cards is a great solution.
If you enjoyed this article, got some value out of it, or if you have a question you want answered, hit us up in the comments section below!