So you just lost a quarter mile and now everyone’s making fun of you for your granny shifting skills.
We get it – shift happens.
While we may not be able to teach you those mad double clutching skills, we can at least help you modify that shifter. We’re going to walk you through how we raised the shifter cage in our Budget Time Attack Evo. As well, we’ll look into some other mods that can help improve your shifts.
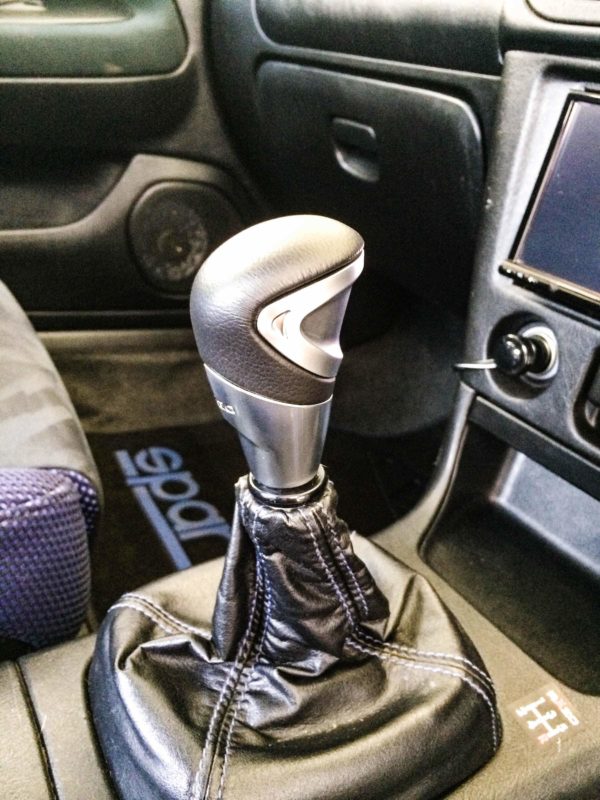
Ok, so the question becomes: how do you do this (and for cheap)? Easy. You’re just going to need a couple things. For tools, you will want either a metal chop saw, or a hacksaw will do in a pinch (you just need some way to cut through aluminum and get a nice flat cut). You will also need some sandpaper, a file, and the usual sockets / ratchet.
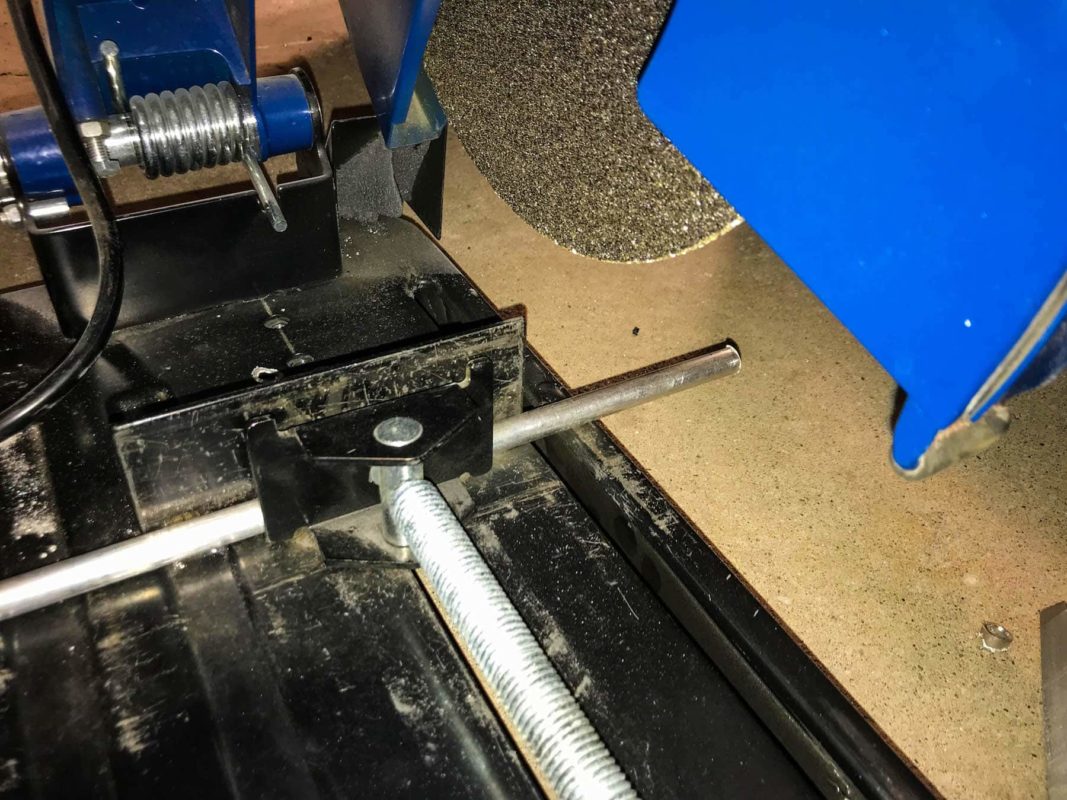
Start by heading to a metal supplier, or even a hardware store. You’re looking for some round aluminum tube to make the spacers with. The inner diameter needs to be 8 mm or a slight bit more. You’re going to be putting an M8 bolt through this tube, so you want it to be as snug as possible; too loose and it will rattle around. The thickness of the tube is up to you, and may depend on what is available. You will need around 400 mm (16 inches), but it is best to get a bit extra incase you make a mistake. Some metal markets will even offer up scraps of tube for purchasing. In our case, we got 3 feet of aluminum tube for $3. Now that is how you modify on a budget!
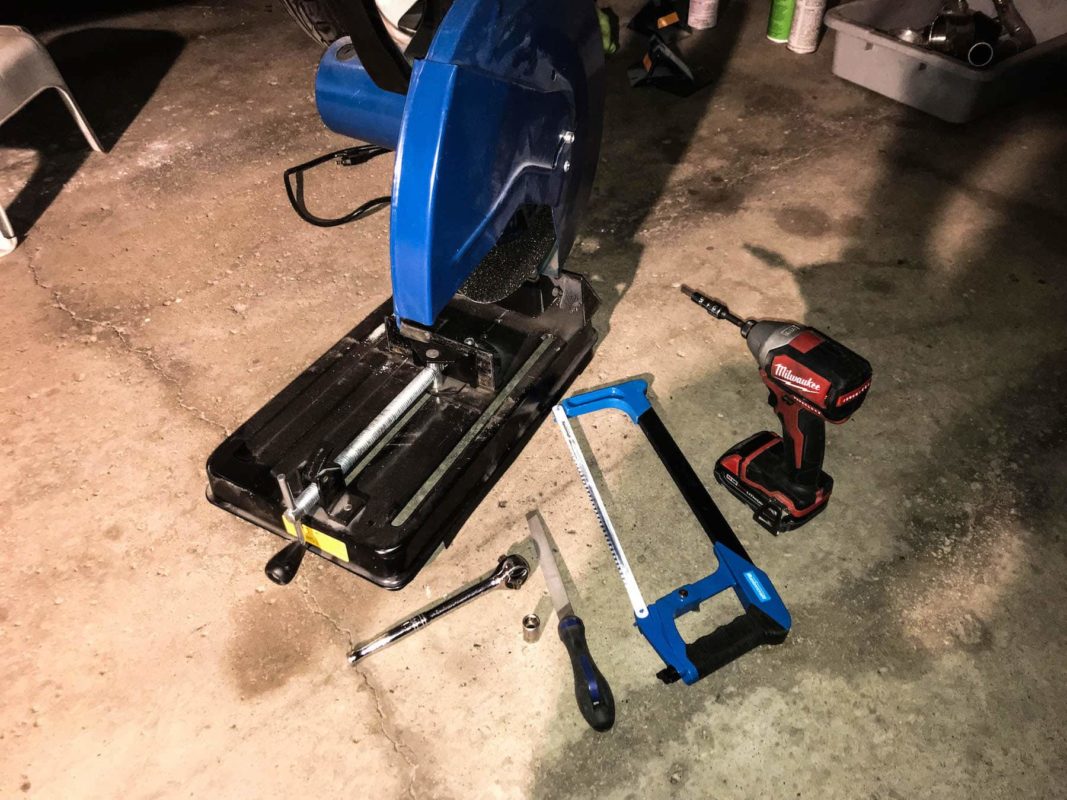
Next, head to a bolt supply store. You’re in need of 4 bolts, M8 x 1.25, 120mm length. As well, you will want 8 large washers, M8 size as well. Now, we are raising our shifter by approximately 90mm, but if you would rather not go as high, shorten the bolts accordingly. We opted for stainless steel socket head bolts, and it still only came out to $10 for all of them.
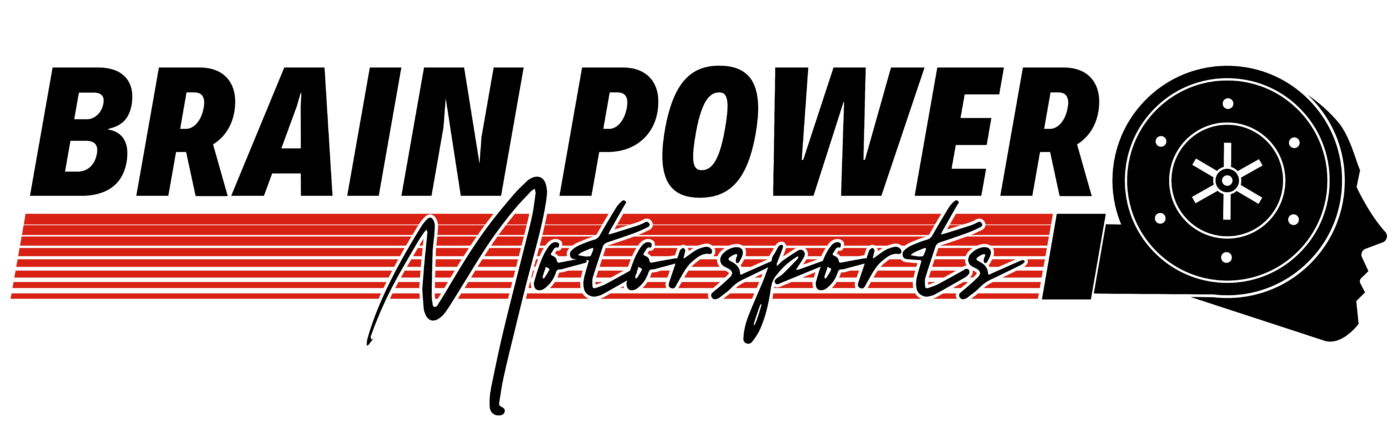
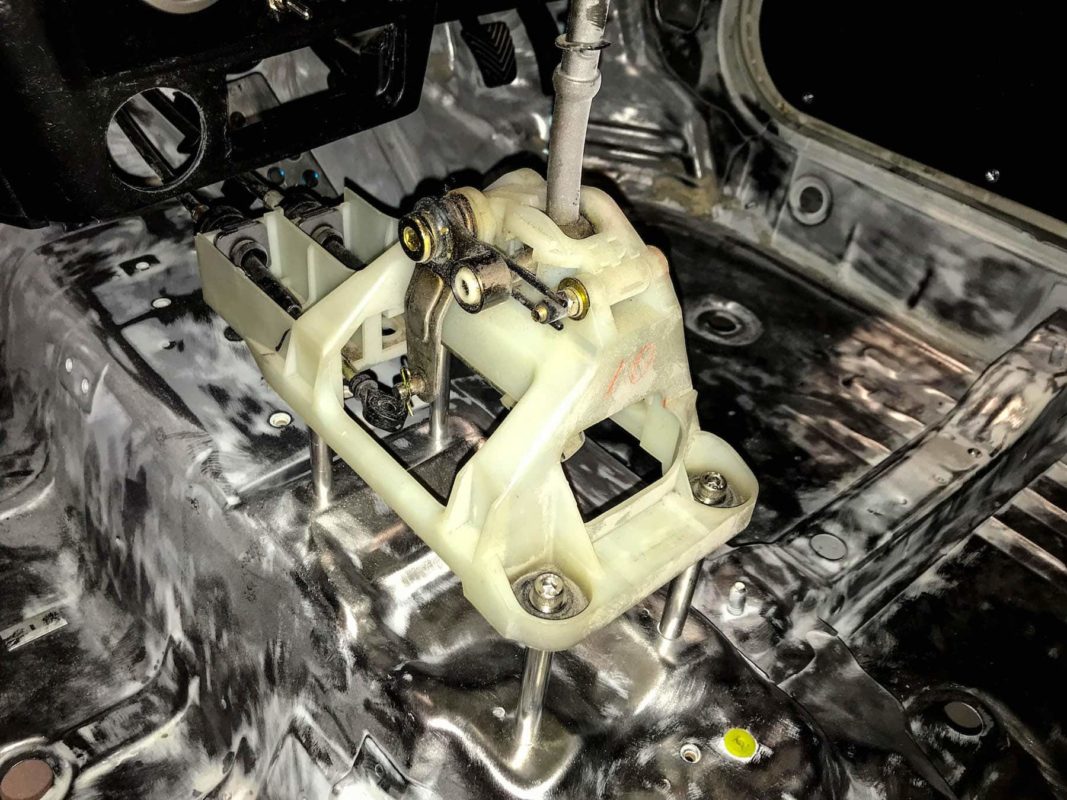
So that’s all you need to do this job. Total came out to $13, so we’re pretty happy. Now let’s get to the good stuff. Since this is going to be a track car, the interior has been gutted. This includes the center console plastic trim. It should go without saying, if you’re doing this modification, you will not be able to keep that plastic console. Sure, the shifter cage is ugly with its slightly yellowed plastic, but we’ll fix that later. Remove the shift knob, undo some screws, and pull the plastic console out. You’re now left with just the shifter cage.
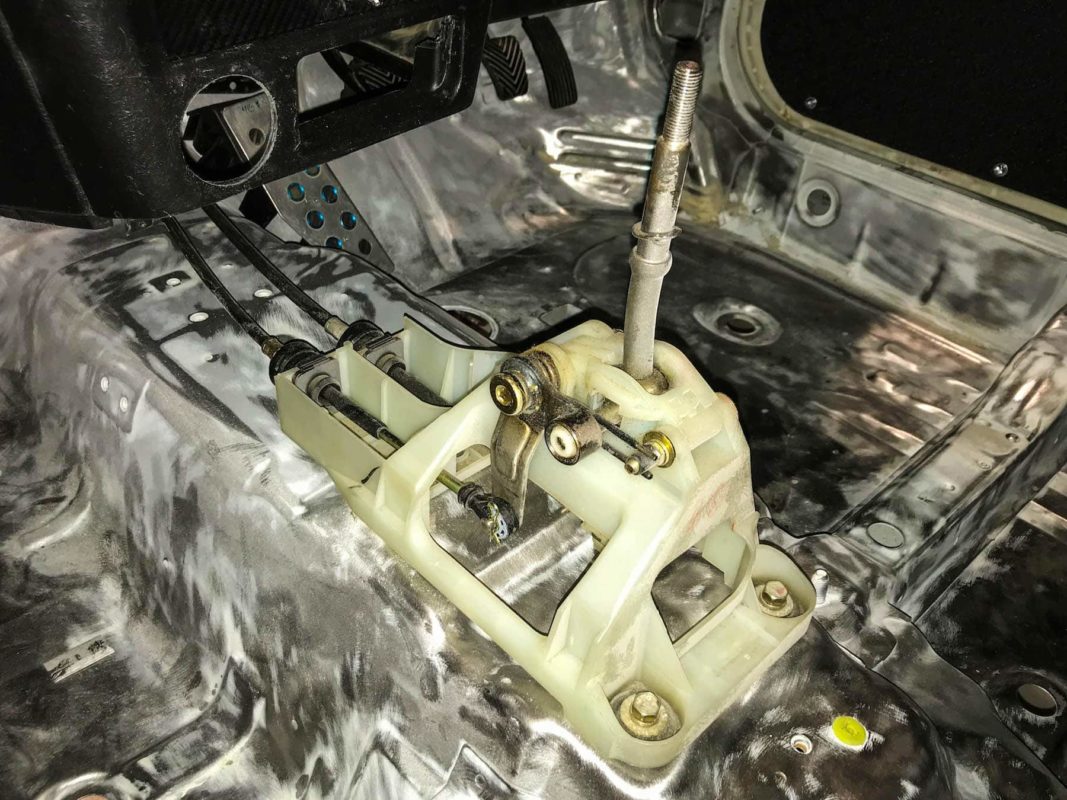
Since our Evo is headed for the track, the airbags have also been removed. If, however, you have decided to keep them in, you may need to adjust where the shifter cables are routed around the SRS ECU.
Take the aluminum tube that you bought and cut it into 90mm length pieces. Use either a chop saw, or a hacksaw to do this; you want the cuts to be nice and flat. Take a file and clean up the edges of the cuts. For that extra bling, sand the tube down with some fine grit paper, and then follow up with a metal polish! You will need 4 of these spacers. Once you have that all done, move to the car.
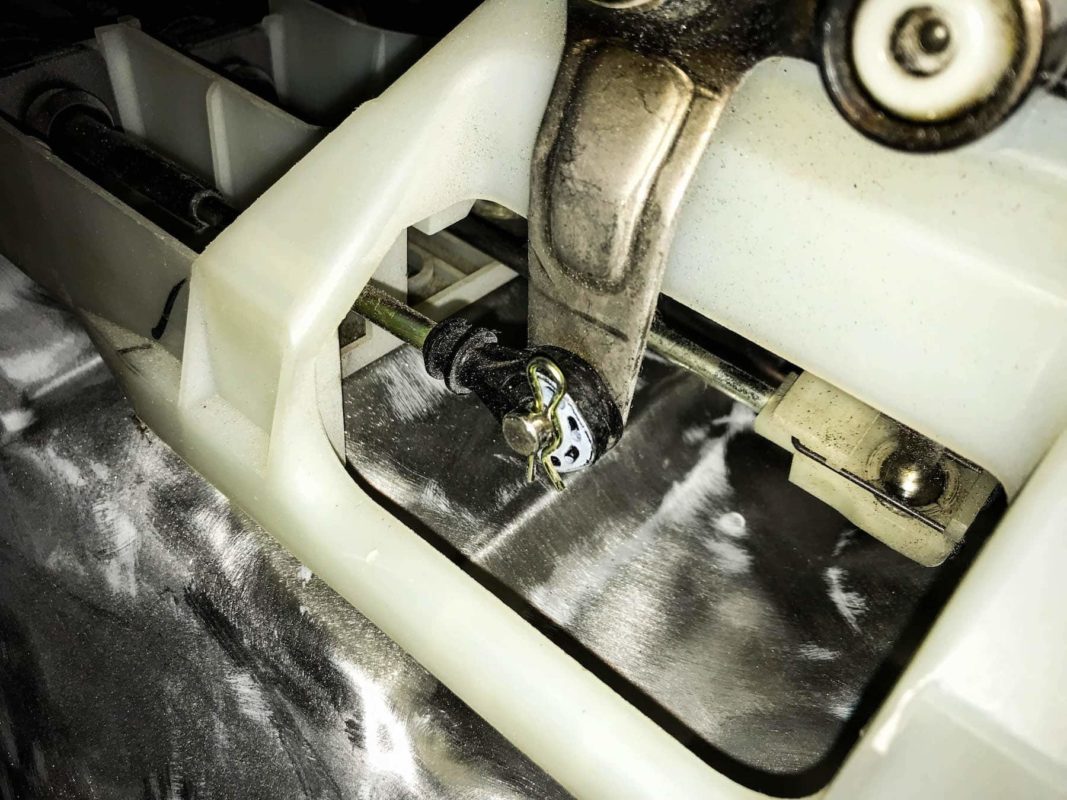
Remove the 4 bolts holding the shifter cage to the body of the car. A 12mm socket is required. To access one of these bolts, you will need to release a shifter cable from the cage. Pull out the pin and slide the cable off of the arm. This will give enough clearance to remove the bolt.
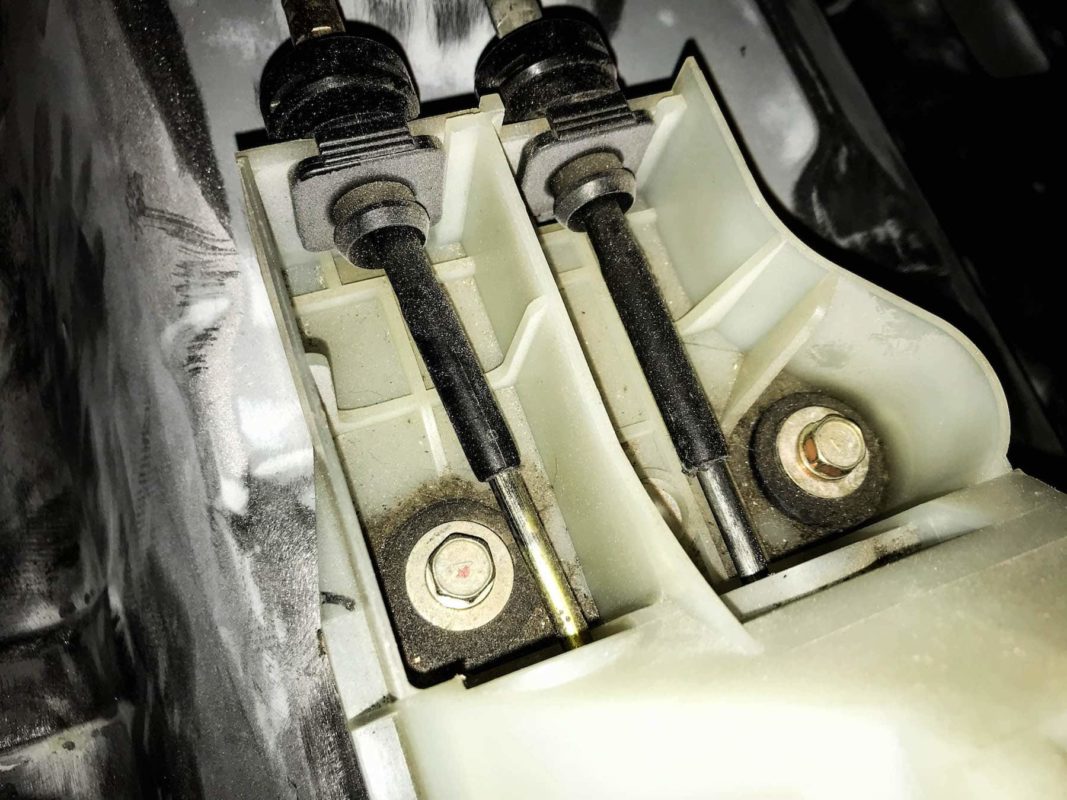
Next, take the first spacer and position it under the shifter cage. Sandwich the shifter bushings with 2 washers, and insert the bolt. Thread it in slightly to help hold the cage in place. Then repeat the process with the other 3 spacers. Once you have all 4 of them positioned properly, you can tighten them down. Oh, by the way; that’s it. You’re all done! Simple, easy, and cheap.
Sit back and marvel at the work you have just finished. And then look at the hideous color of that shifter cage and realize you still have a bit of work to do! Next week we will be pulling the fasteners off of the cage and painting it black. We will scuff the plastic up with some sandpaper, throw down some adhesion promoter, and then cover it in a few coats of black paint.
It is worth noting some other modifications that you can do to the shifter at this point. Solid bushings are a popular upgrade to the factory rubber ones. Go a step further, and throw some solid bushings in at the transmission side as well for a nice firm feel. Companies like STM, Buschur Racing, Torque Solutions, and AMS are popular choices here. Another great option is to install a short throw shifter. Once again, Buschur and Torque Solutions offer up versions of this. All of these modifications are compatible with the raised shifter cage, and overall will create a nice, crisp feel to your shifts.